If the sata driver is not in cd, you can find on your computer manufacturer website, the site into the driver tab, then do browse and use keywords your computer's specifications. For notebook use the code or your notebook series:
example: (Notebook) Acer TravelMate 6291,
Description: From personal experience, some computer or notebook now there is notneed to do injection sata drivers, such as the latest type acer notebook don't need sata drivers, just need to do configuration on a hard disk interface settings in bios, if you want to install Windows XP disk then change to the interface IDE or ACHI (commontly in peripheral settings).
Software to inject sata drivers into the windows installer is nLite (a freeware software), you can download the software they will be on site: download nliteos
Once downloaded, just install nLite, if not installed on your computer usually needs to be installed windows XP service pack, ie NET Framework 2.0
can be downloaded at:
http://www.nliteos.com/download.html, or in http://www.microsoft.com/downloads http://www.microsoft.com/downloads/details.aspx?FamilyID=79bc3b77-e02c-4ad3 -aacf-a7633f706ba5 & displaylang = en
1. The next step is to start the process of injection sata drivers into the windows installer. This process should you do on a computer that has an active windows.
Copy the entire contents of the windows cd (original) into the hard disk, a directory named for example: WinXPSP2
Then run the program nLite
2. Click Next
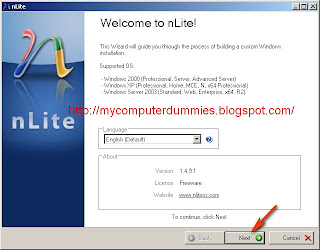
3. Click Browse, navigate to the directory that contains the windows installer file (D: WinXPSP2)
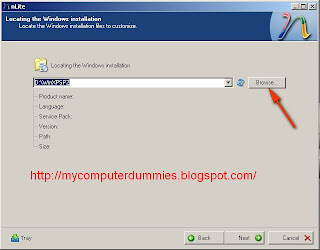
4. Click OK
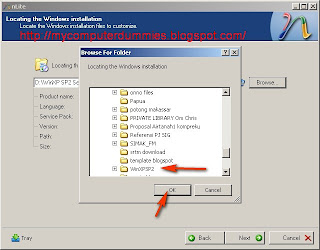
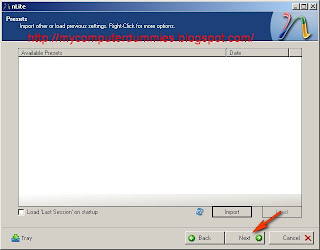
5. Click on Next, it will appear the following dialog box:
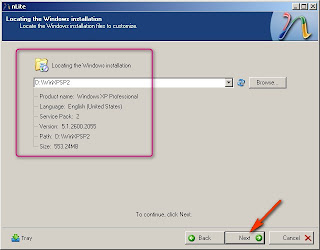
6. Click Next
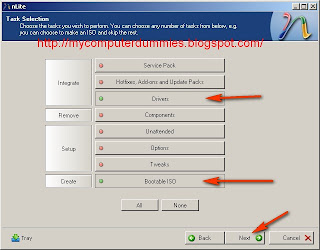
6. Click the Driver and Bootable ISO until the green button
(Driver: to integrate sata drivers ie drivers into wiindows installer, you can also include other driver)
(Bootable ISO installer for windows that you create can boot automatically when the CD has been copied )
Click the Next button
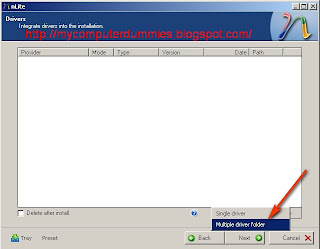
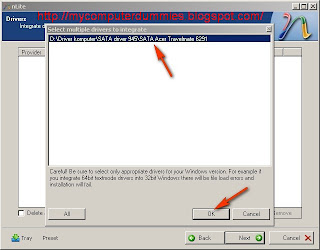
7. Select Multiple driver folder if the driver is more than one, if only one file just select a single driver
8. Find the file that contains the sata drivers on your computer, click OK
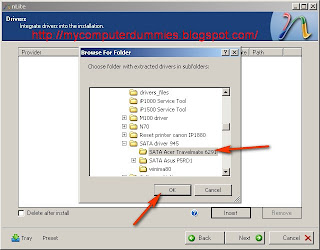
9. Select Sata driver
Click Ok
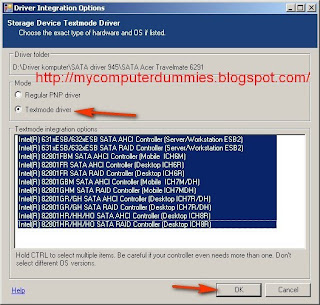
10. Select Textmode driver
Click OK
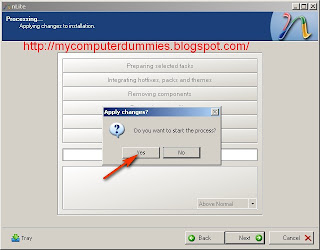
11. Click Yes in the dialog box "Do you want to start the process?"
12. Click Next (you've managed to integrate sata drivers into the windows installer), then you will create an ISO file or directly burning to a CD blank
Click next
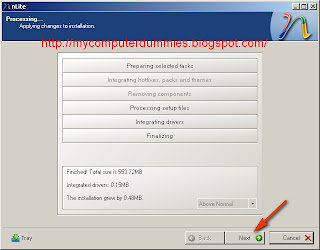
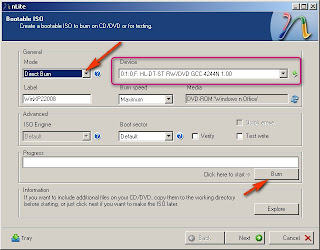
13. Now you can make a first ISOnya, or burning directly to blank CDs. Insert the CD into the CD RW Drive and press the Burn button,
Congratulations you already have a installer file of windows with sata driver integrated.
14. Next step is to go back to your first computer, run the computer and set the bios settings to boot from the CD ROM started.
15. Please you're installing windows installer file with this CD, follow instruction, if not problem then dialog confirmation of sata drive would not be asked again and sata hard drive you have can be recognized by installer Windows XP (if not yet recognized that there are sata driver files that you have not injection to windows installer, please doing the procedure 1 to 12 to fix it, select other compatible sata drive " text mode driver" )
Good luck .....!!!!!!
No comments:
Post a Comment